Install Ubuntu Desktop 18.04 LTS on external SSD and multiboot
Currently, the main personal computer I use is a Windows 10 desktop PC.I used an external SSD to create a dual boot environment so that I can switch the OS between Windows for everyday use and Ubuntu as needed, and the same PC.In this article, I will show you the procedure to install Ubuntu Desktop 18.04.2 LTS.
You can install it in the same procedure in the following situations.
- Install Ubuntu on the assembled homebrew computer
- Install Ubuntu on the added HDD / SSD
- Install Ubuntu on external hard drive / SSD
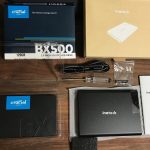
By the way, for the external SSD, I bought an external case and SSD and made it myself (it is the cheapest and you can customize it to your favorite appearance).
Prerequisites
Recommended specs for the installation destination computer
- 2 GHz dual core processor and above
- 2 GB system memory
- 25 GB free hard drive space
- DVD drive or USB port
- Internet access
Ubuntu 18.04 installation instructions
- Download Ubuntu 18.04
- Create installation media via USB
- Ubuntu installation
1. Download Ubuntu 18.04
Download Ubuntu Desktop 18.04.2 LTS from the official website below.
https://jp.ubuntu.com/download

There is also a Japanese rimix version, but if you are connected to the Internet, it will be displayed in Japanese for the time being.Install the normal version because it is premised on the net.
2. Create installation media via USB
In order to install Ubuntu, you need to create the installation media. DVD is fine, but this time we will use USB. XNUMXG was enough.
2-1: Preparation of installation media creation software
To create an Ubuntu boot disk (installation media) via USBRUFUSInstall the software called.
Download destination:https://rufus.ie/
Rufus is software for creating and formatting bootable USB flash drives (such as USB sticks). (Omitted)
Of particular note is the speed of Rufus.For example, Rufus can create a Windows 2 USB installation drive from an ISO twice as fast as UNetbootin, Universal USB Installer, and Windows USB / DVD Download Tool.Similarly, Linux boot disks can be made slightly faster.
Rufus has been updated recently (March 2019.03.28, XNUMX) and seems to be fast, so I used it.If there is a similar function, I think that another software can be used.
2-2: Creating a boot USB
USB will be formatted, so move it in advance if it contains data.
rufus-3.5.exeOpen and select the Ubuntu iso image file downloaded from "Select".

When the "Status" is ready, "Start" and write in "ISO image mode".It takes a long time, so we recommend connecting with USB 3.0 or higher.It took about 40 minutes to complete the creation.
3. Install Ubuntu
3-1: Change the order of booting discs
After creating the boot USB, restart your computer while pointing at the USB.
If you keep pressing the "F2" button on the booting logo screen, the BIOS screen will appear, so set the boot order of the disc to Ubuntu from the boot menu.
This site will be helpful.
Change drive boot order
3-2: Ubuntu installation
If it can be started successfully, the following desktop will be displayed. Select "Install Ubuntu" to start the installation.

(XNUMX) Select "Japanese".

(XNUMX) Select "Normal installation" or "Download updates during Ubuntu installation".

(XNUMX) Select "Delete the disk and install Ubuntu".
The installation destination disk will be specified later.

(XNUMX) Select the drive to put Ubuntu.Specify the external SSD or the added drive here.

Note that if you select a Strage that already contains the OS and data, it will be irreversible. When you press "Install", the final confirmation will be displayed, so press "Continue".
(XNUMX) Enter your name and password at startup

Then wait for the installation to complete and reboot.
That is all.